Some basic field and sample preparation techniques
Field Sampling:
Sampling for tree-ring studies involves removing increment cores from living trees or cross sections from dead trees. Dead trees - snags (standing dead), logs, or stumps - are often referred to as remnant trees. Remnant trees can be cored, but be careful; it is more difficult to start the borer in dry heartwood and decayed sapwood will often jam the borer.
Increment cores are sampled with increment borers. Borers should be clean and sharp to obtain straight, unbroken cores. If a core comes out either broken or twisted it is time to clean or sharpen your borer. It is very important to take good care of the cutting tip of the borer; keep it out of the dirt and protect it from rocks or other hard objects. Even when walking between trees, put the borer back into the handle to protect it. Treat it always as a fine cutting tool and protect it from anything that will chip or dull it. Also be careful about getting dirt or small rocks in the borer handle which can create nicks on the cutting tip when the borer is slipped back in. Another item to be careful with is the extractor (or spoon). Don't set it down next to the tree while coring; it is very easy to lose and then step on and bend. Put it in your back pocket or jam it in the tree bark while coring. Also tie on a piece of brightly colored flagging or ribbon for better visibility in case you do drop it somewhere.
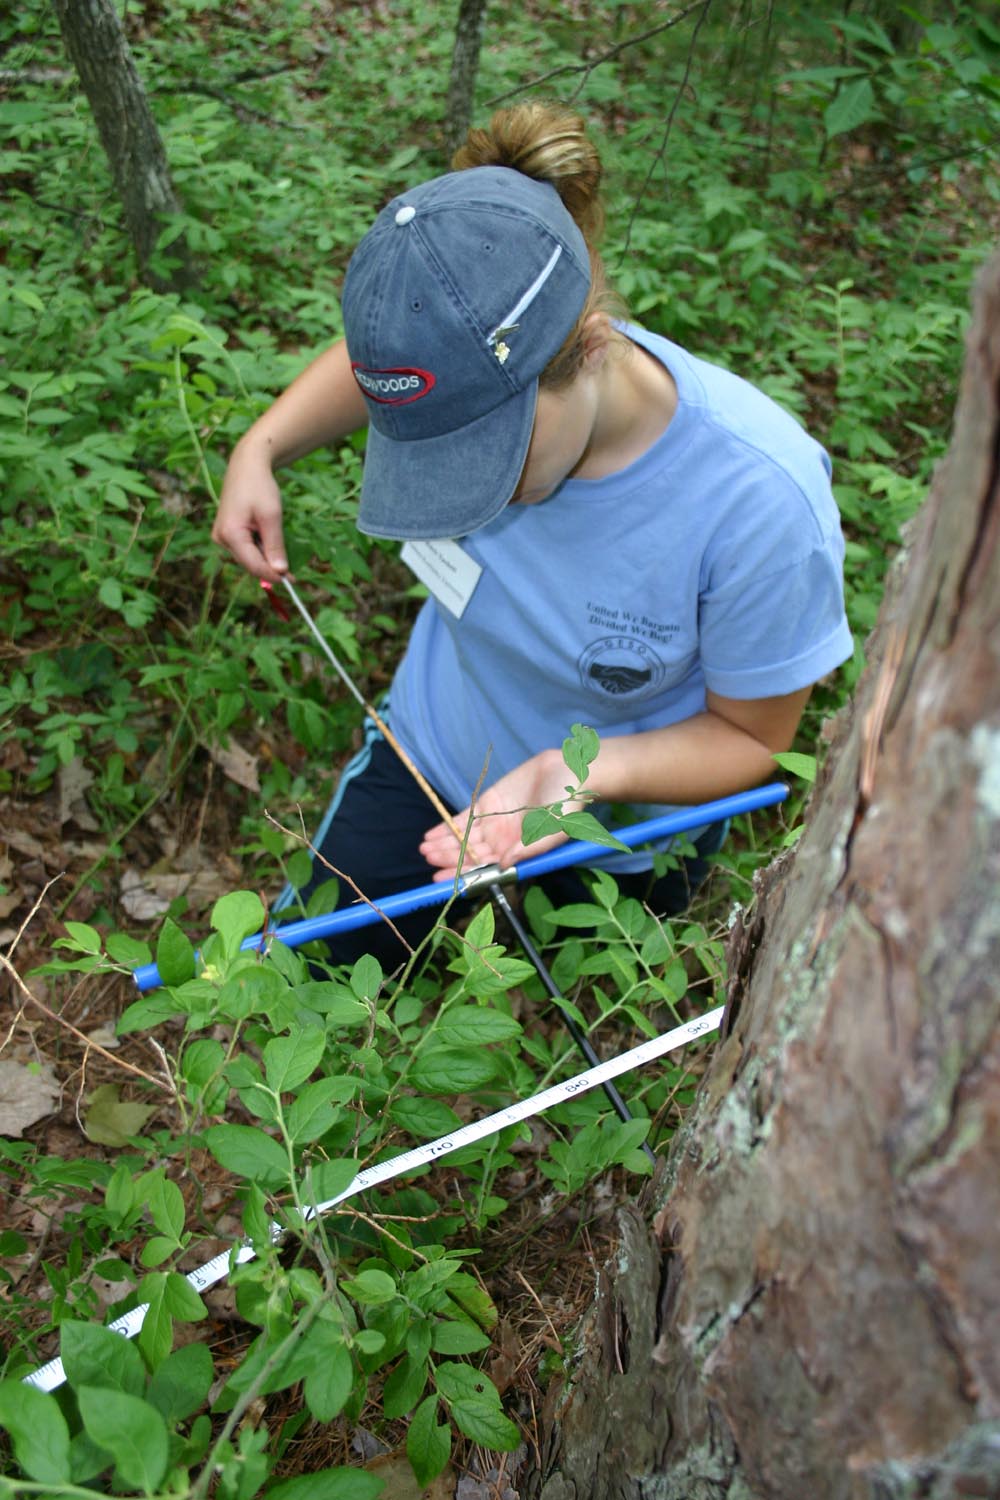
To start the borer, use the palm of one hand to both push and turn from the center while holding the borer shaft with the other hand. Try to keep the shaft as straight as possible when starting to avoid cutting a crooked core. On thick-barked trees, start the borer in a bark furrow rather than in the thicker areas of the bark; bark often can jam in the shaft and cause the core to twist. Once the threads have caught, the handle can be turned using both hands. If coring all the way into a tree, typically the borer handle will run into the tree (or your knuckles will) before the full length of the shaft can be used. One trick for maximizing the length of the borer is to use a Quad-B handle (note also the flagging on the end of the spoon in this photo); directions for making one can be found in this article from the journal Tree-Ring Research.
Once you're ready to extract the core, slip the spoon down the shaft until it jams against the core at the end of the borer. Push the spoon in somewhat firmly with the palm of your hand but avoid bending it, the spoon is fairly fragile (it shouldn't go all the way in, usually there will be a half-centimeter or so left sticking out from the end of the borer). The teeth at the tip of the spoon will lock the core against the borer shaft, and backing the borer out 360° will break the core off from the inside of the tree. If you're trying to get as close to pith as possible (for example, for age structure studies; see below), backing out 360° will tell you whether pith is to the left or right relative to the curvature of the rings. Pull the spoon out carefully in case the core is broken, but ideally your cores should come out straight, solid, and in one piece if you have a clean, sharp borer. If the core is broken, you can slip it into a straw as it you pull out the spoon.
If the spoon won't go in all the way because of a jam, twist it around to see if you can get past it. A jammed borer can occur because of a broken core, bark, a branch or scar, or rot in the center of the tree (or rotten sapwood if coring a remnant tree). If you feel any change in tension while coring, stop immediately. It depends a lot on the site and species but you will eventually run into heartrot in a tree (or even a whole stand). If you run into heartrot, the borer will start to turn easily while coring. On the other hand, if you run into a branch or scar the borer will be harder to turn. In either case the core can twist inside the shaft and jam the borer, so stop before you go too far. One trick for checking to make sure the core is not twisting is to check the depth of the core every few turns. Slip the spoon in just to the point where you feel the end of the core. Mark that point on the spoon with your thumb, then pull the spoon out and check it on the outside of the borer shaft; it should equal to the length of the borer sticking out of the tree. If it doesn't, stop immediately and take out what core you can; the core will have to be redone somewhere else.
If you can't get the spoon in all the way because of a jam, you may be able to clear it in the field or you may have to it drill out the from the handle end using a long drill bit. Never try to drill out a jam from the cutting tip! Nothing metal should ever be used on the cutting tip; again, always treat it like the fine cutting tool that it is. Your field kit should include a 50-60 cm long drill bit for clearing jams from the back end of the borer. You may be able to find one at a hardware store; in the US, Harbor Freight stores have long drill bits. Otherwise, to make one, take a regular 3/16" drill bit to a welder to weld on the right length of round stock. An alternative is to use a long piece of threaded round stock that you can find in a hardware store; buy a 50-60 cm long piece and then make a point and flatten two sides of the tip on a grinder to make an ideal drill for a jammed borer. If the plug hasn't jammed too much of the shaft (only the last cm or so), often it can be knocked out using either a chop stick or golf tee. Either of these can be used without damaging the cutting tip. Again, never use anything metal on the cutting tip!; Put the handle end on your shoe or a branch to avoid damaging the borer and use a rock to very gently hammer the golf tee or chop stick to clear the jam. Even a stout, straight branch of the right size often can be used to clear a small jam. However, if the jam is too big to gently punch out, you'll have to drill it out with your long drill bit.
Once you have your core, the next question is how to get it back to the lab for mounting on wooden core mounts. Cores are removed from the field using either plastic or paper straws. They should be allowed to dry for at least a few days before mounting; do not mount cores while wet, they shrink after drying and will break apart on the core mount. I highly recommend paper straws over plastic; cores can dry in paper straws while they tend to mold in the plastic ones. If using plastic straws, make some slices or hole punches in the straws to allow some air circulation. Paper straws can be harder to find than plastic, but I recommend the Chenille Kraft Company's Artstraws #CK-9031, 900 straws to a box. The straws are 42 cm (16.5") long, 6mm (1/4") diameter, wide enough to hold both 4.2 and 5.1 mm cores. Search on the web, lots of places carry them.
.jpg)
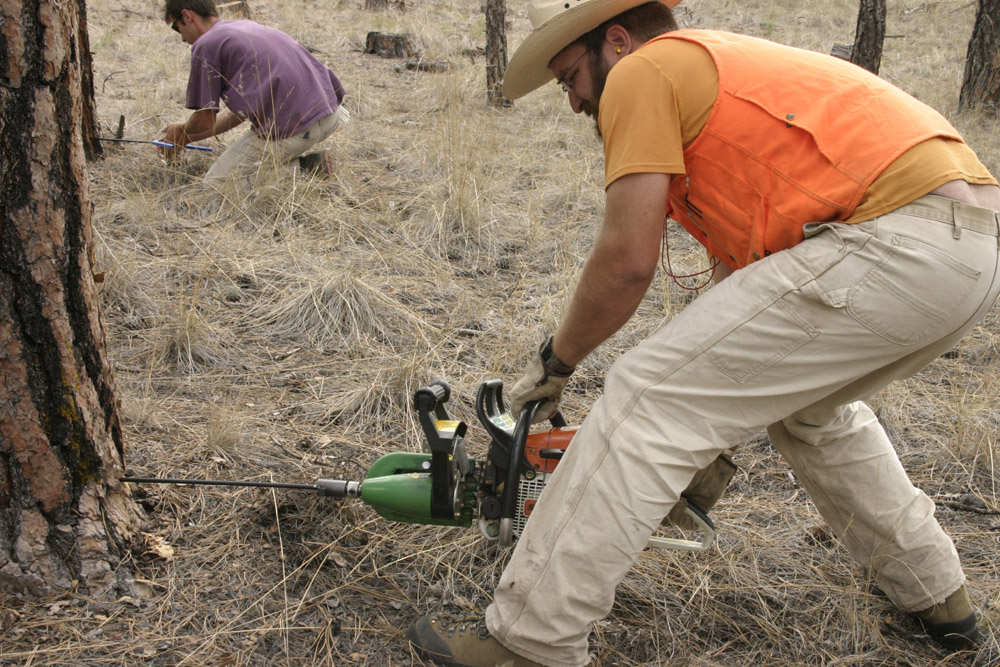
Remnant trees can be cored although it is often difficult to get the borer started on a dry wood surface compared to bark and green wood. The borer has to be very sharp, and use lots of lubricant such as WD-40 or beeswax. A better method to sample remnant trees is to cut a cross section, especially for fire-scarred studies in which multiple fire scars are recorded on the tree. The easiest way to cut cross sections is, of course, with a chainsaw. Chainsaws should not be used without prior instruction from an experienced sawyer and without safety gear such as saw chaps and ear and eye protection! For sampling fire-scarred sections, we often use "plunge" or boring cuts, in which the tip of the saw is used to bore into the tree; these especially are extremely dangerous without prior instruction and lots of saw experience! Handsaws also are often used for taking sections from smaller remnant trees. One trick for getting cross sections out of the woods and into the shop, especially old remnant sections in several pieces, is to wrap them with plastic stretch wrap, available from several distributors on the web (I usually buy from Uline, search for Goodwrappers 3" x 1000 ft stretch wrap).
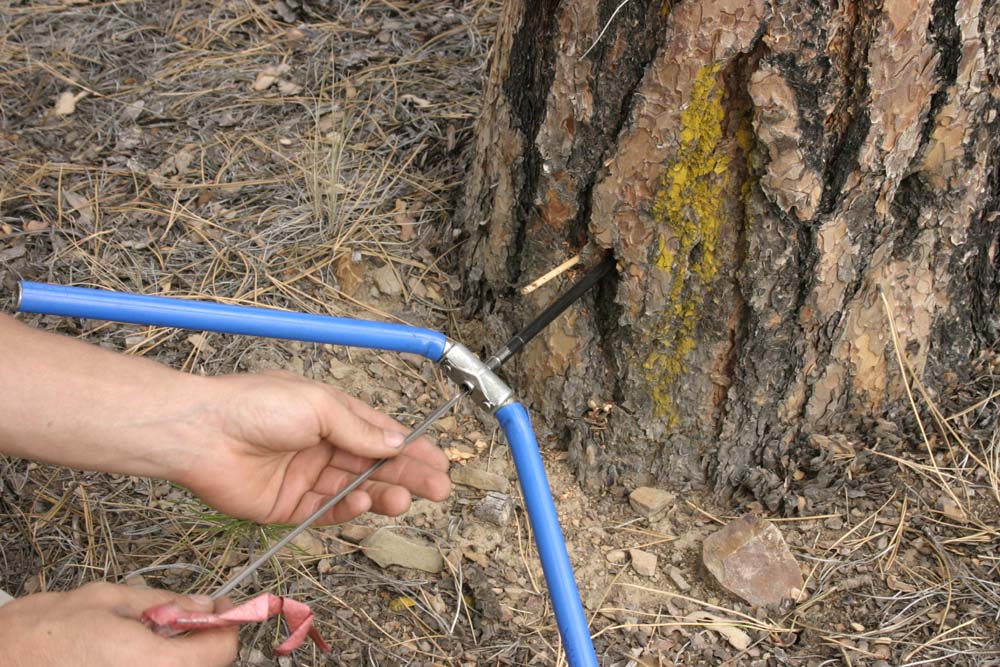
For age structure studies we have been using a powered increment borer setup run by a Stihl 044 chainsaw motor. This allows for fast, efficient coring of large numbers of trees, and is an easier way to core near ground level to obtain better estimates of tree establishment dates. The power borer we use features a drill head made by Atom Industries in Australia (although note that no one imports these to the US and they have to be ordered from Canadian distributors) coupled with a custom chuck specially made for rapid mounting and removal of regular increment borers. The chuck is made by Bitterroot Tool and Machine in Montana (although I am not sure they are still making the chuck). The drill attachment has both forward and reverse gears for insertion and removal of borers. For our age structure studies, we have found that a three-person crew is the most efficient: one person handling the power borer motor with 3-4 borers going at a time (as soon as one is in the tree, s/he moves on to the next); the second person to back out the core and see if it is close enough to pith (our protocols call for the core to be no more than ~5 rings from pith); and the third to straw the core and write the sample id on it. If the first core is not close enough to pith, the person with the power borer backs the borer out and then moves over the estimated distance needed and cores parallel to the first core (which you can see in this example, the first core is the one to the right, slipped back into its hole to give a good angle for the second). Do not try to angle the second core relative to the first, but simply move over the estimated distance and core parallel to the first. If the second is still not close enough (within an estimated 5 rings), we will take a third, but usually no more than three total to avoid too much damage to the tree. If the third core is still not close enough, we take the best of the three.
Sample Preparation:
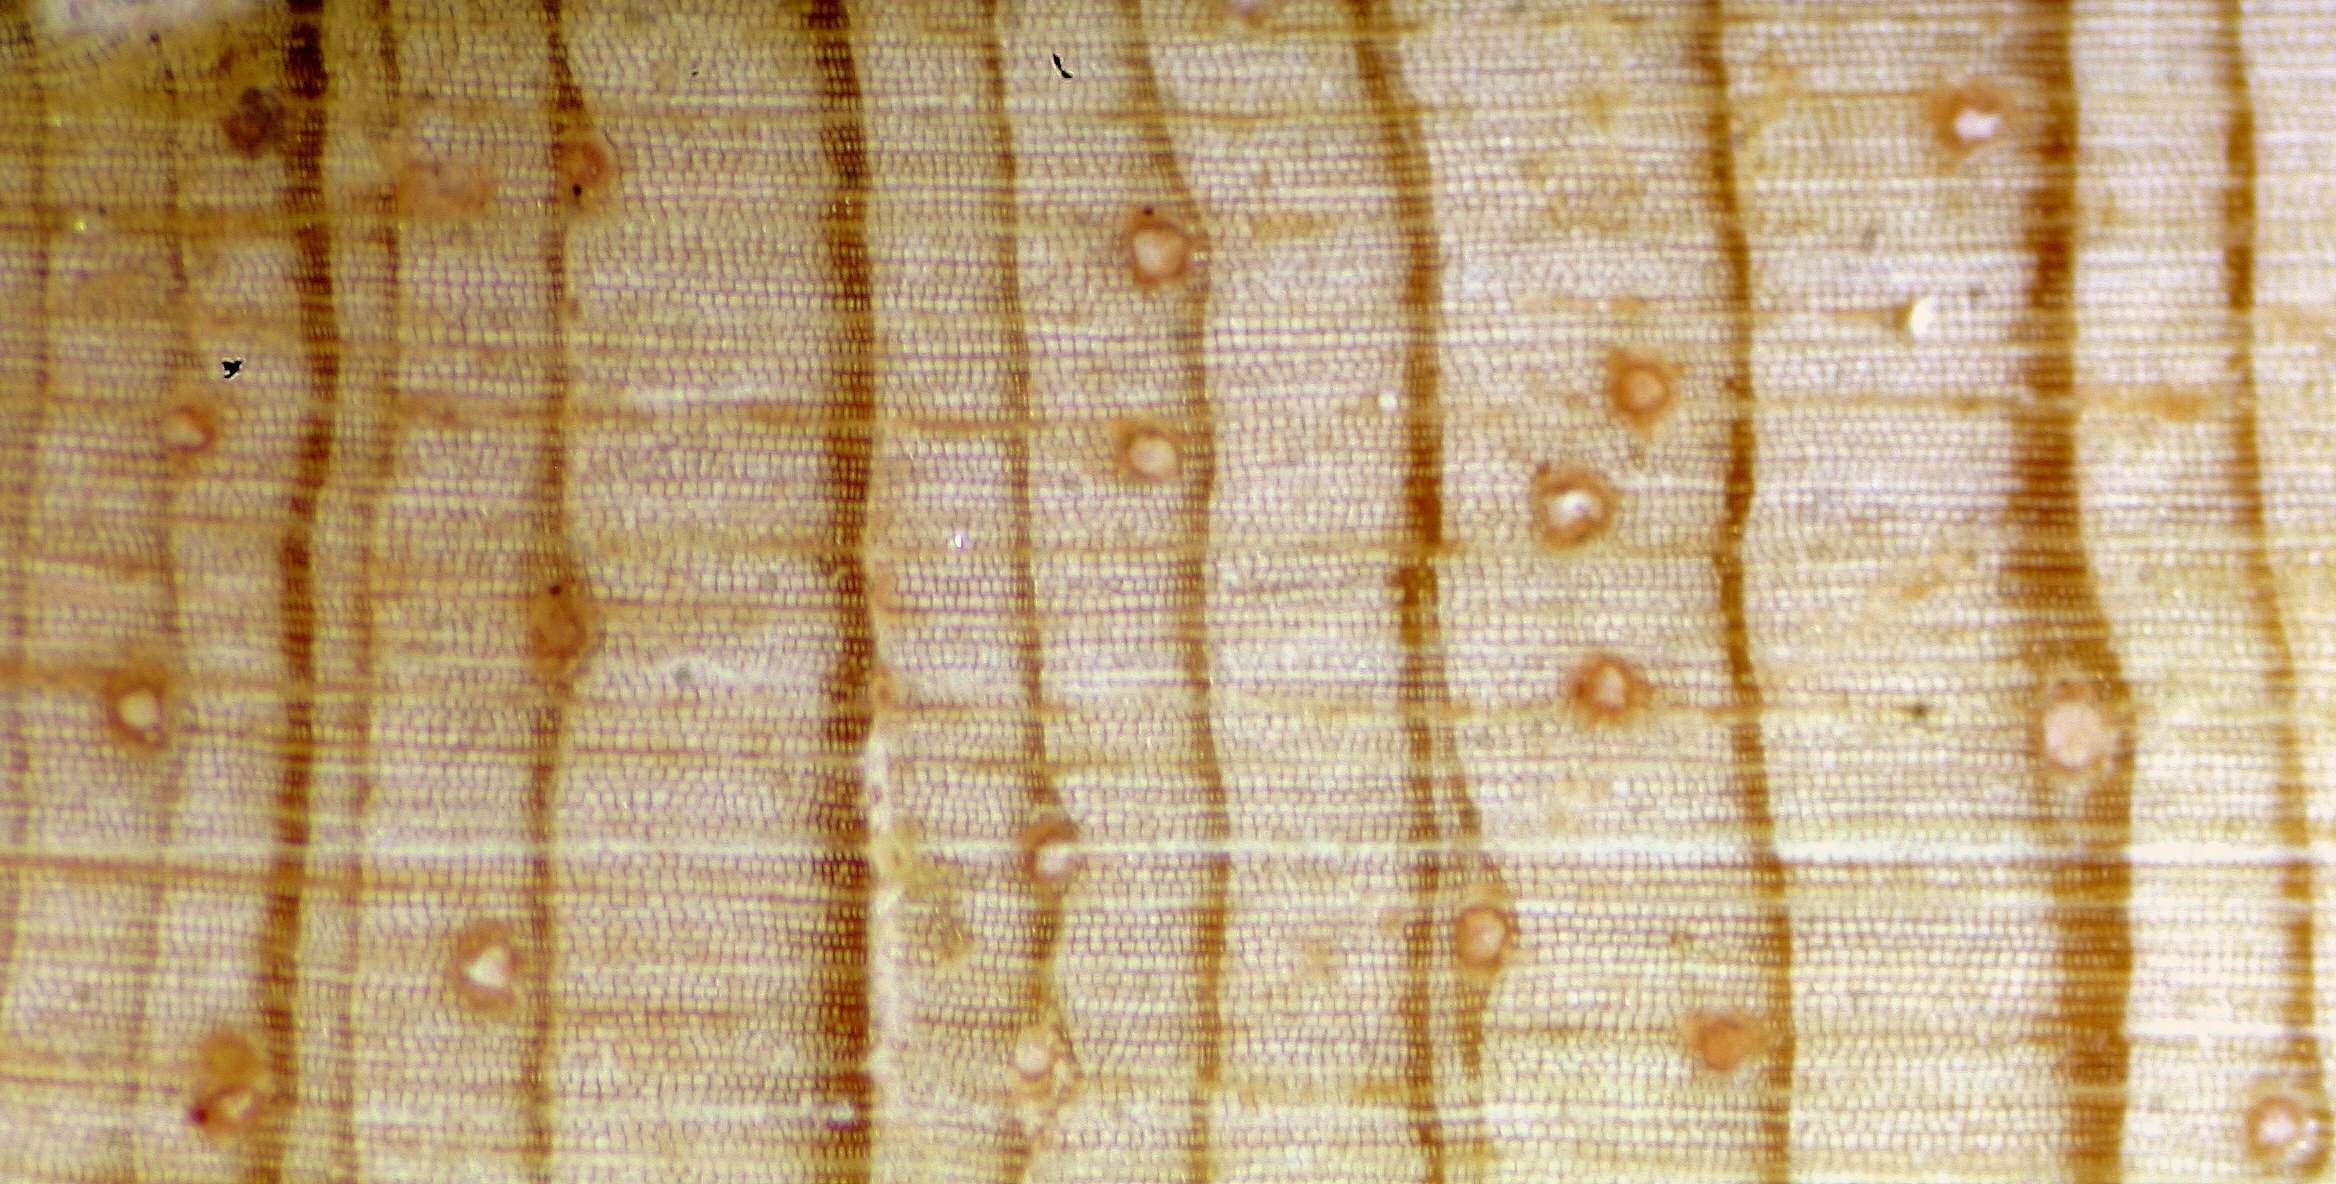
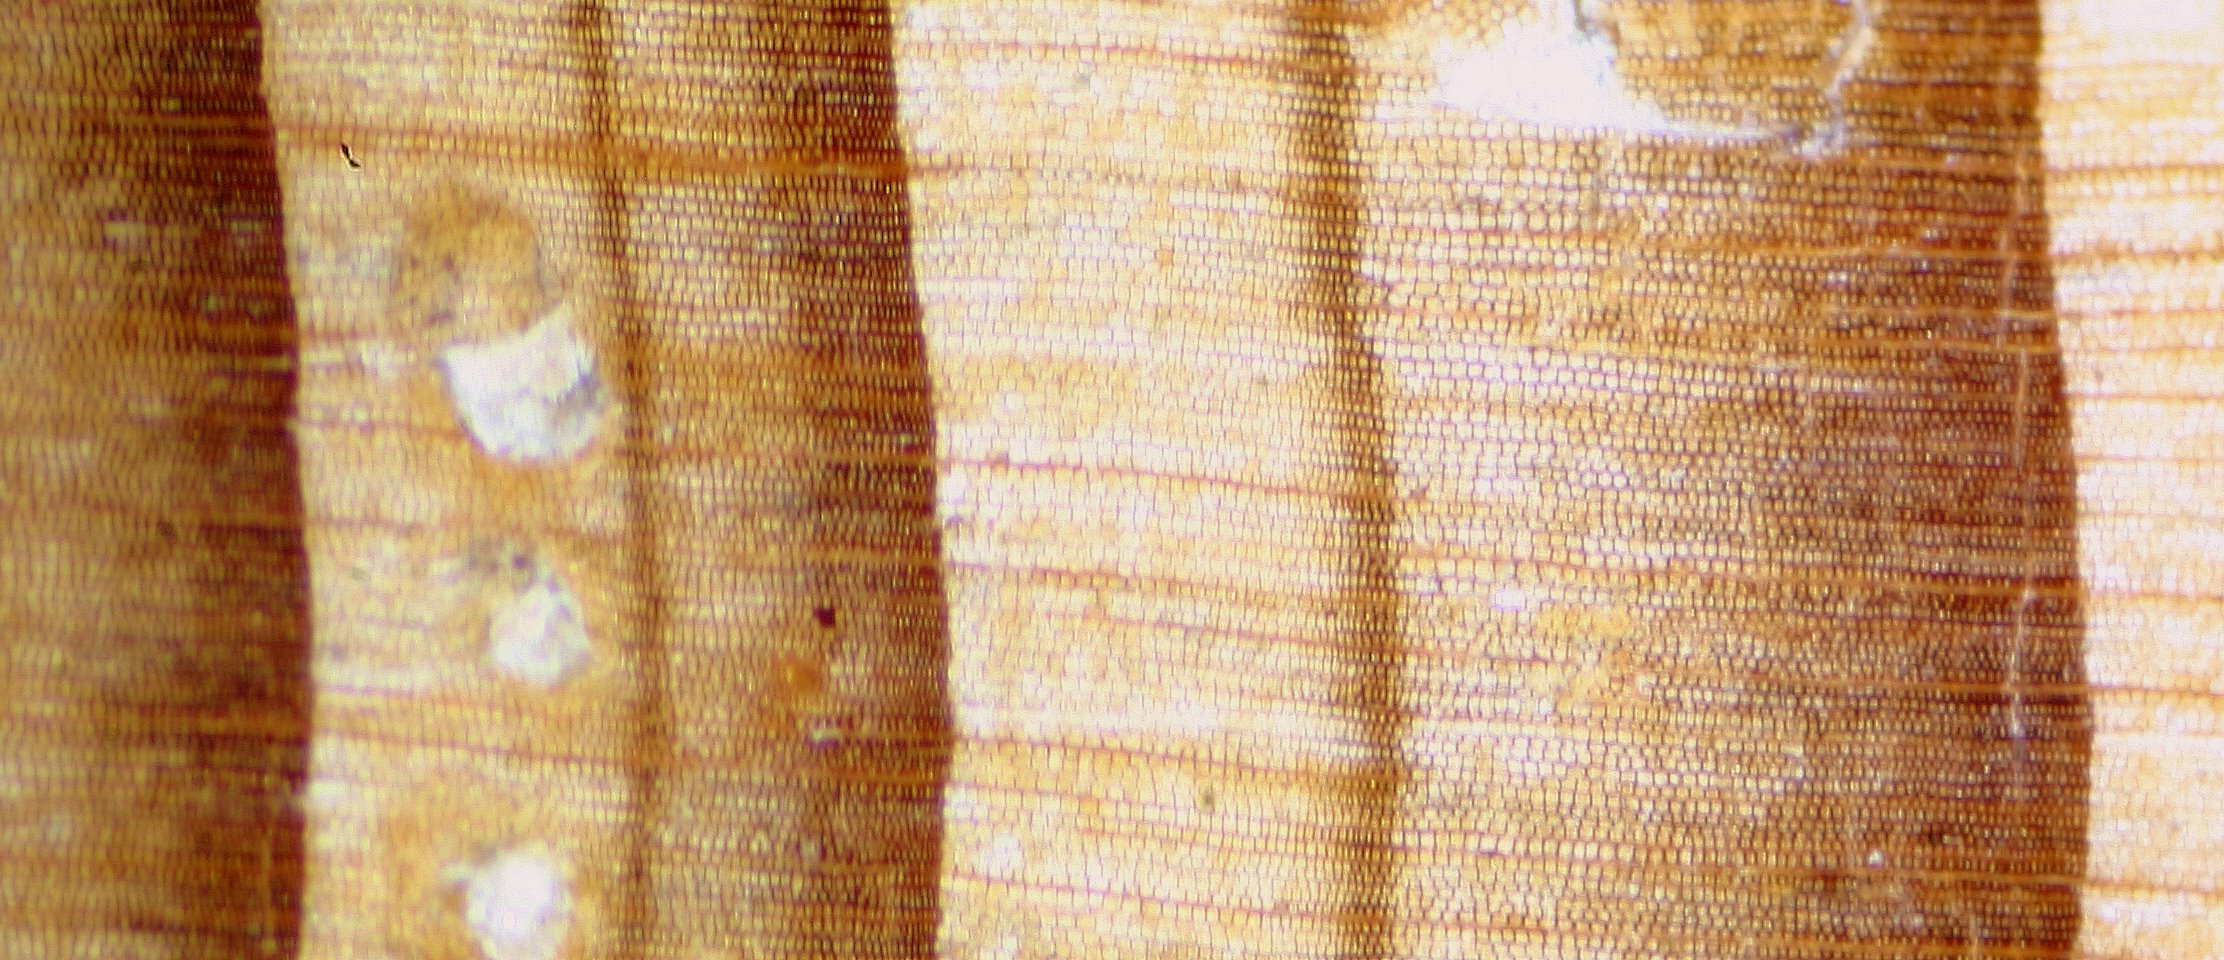
Once you have your samples in from the field, there are three practical considerations for sample analysis that all have to do with being able to see cell structure within your tree rings. Being able to see cell structures is critical to your ability to distinguish ring structures such as micro rings (very narrow rings, sometimes only a few cells wide; see also this image) and false rings (or inter-annual latewood bands; see also this image). The bottom line is that if you cannot see cell structure in your wood then you cannot do tree-ring research.
- First, cell alignment: On increment cores, one should be looking directly down on top of the cell structure to be able to see the rings most clearly. Cores must be aligned exactly as they came out of the tree, with the wood fibers oriented vertical to the field of view. Sometimes cores will come out of the tree either twisted or broken; in this case your increment borer either needs cleaning or sharpening. A clean and sharp increment borer will cut straight, unbroken cores every time.
- Second, a good surface! I cannot emphasize enough how important a good, fine surface is. We use a series of steps to put a surface on both cores and cross sections (see more detailed explanation below). You should be able to see the cell structure of the rings when finished; if not, the surface is not good enough.
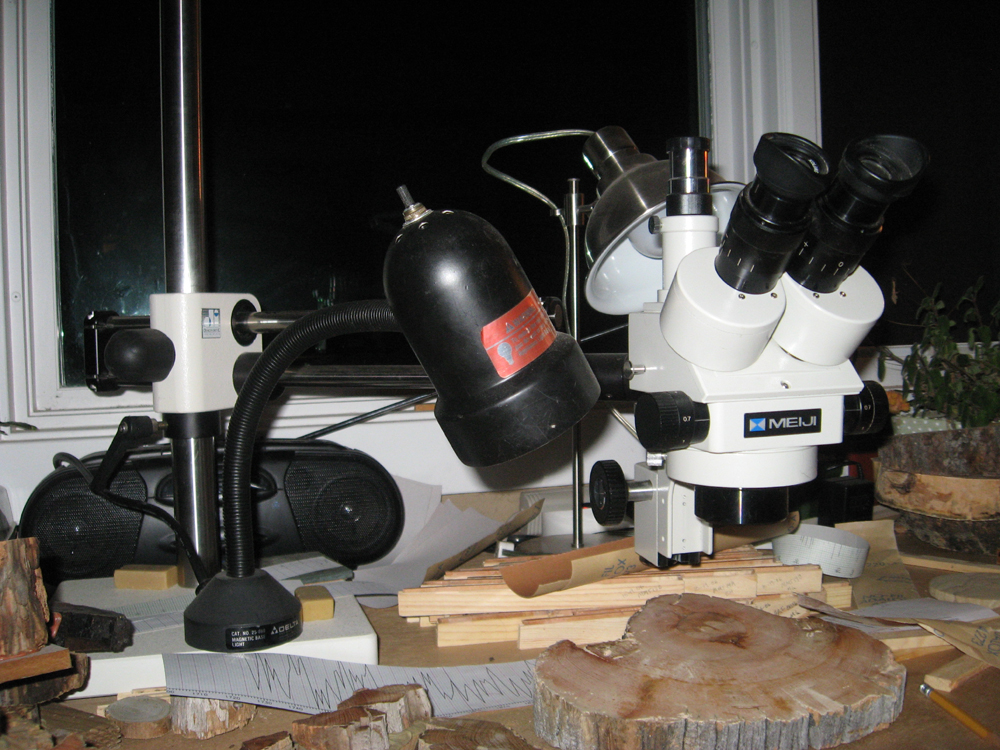
- Third, A good dissecting microscope: It doesn't matter how well your rings are aligned or how good the surface is if you do not have optics able to see the cells within your rings! Put a good chunk of your lab money into a good microscope. A brand that I highly recommend is Meiji; they have optics that I think are comparable to Nikon or Wild scopes that cost twice as much (or more). Be sure to get 10x oculars (not 15x or 20x!) and a zoom range somewhere around 0.7x to 4x, for total magnification of 7x to 40x which covers the range you'll need for tree-ring work. Also a boom arm is important if you will be working with cross sections.
Mounting Increment Cores:
Cores should be dried for at least several days before mounting in wooden core mounts. The mounts provide stability for the cores and a place to write sample ids, dates, and other notes about the core. Simple core mounts can be made by cutting a groove in an ~1 cm wide stick using a table saw or rounded router bit. It is best to mount cores on separate sticks (rather than all on a single board) since you'll often want to compare two cores side-by-side, especially those that come from the same tree.
The most critical component is to glue cores in the core mount with the wood fibers perpendicular to the field of view. These photos are of ponderosa pine, and the tracheids can be seen in both the end view of the core and as a roughened area on the side of the core. Glue them with water soluble white glue (e.g., Elmers) in case you mis-mount a core and need to redo it. In the case of a mismounted core, simply soak the core and mount in a pan of water overnight (wrap some string around the core and mount so it doesn't float away, and you have to weight it down with something to keep it underwater), let it dry, and then re-mount it correctly. I prefer to use scotch tape to keep the cores from popping out of the core mounts while drying, but wrapping them with string also works. Scotch tape has the advantage of being much faster than wrapping with string and you don't have to take it off before sanding (simply sand the tape along with the wood).
Occasionally cores will twist down the length of the core. If cores are taken with sharp and clean increment borers, there should never be any problem with twisting; cores should come out of the tree straight and unbroken every time. However, if you do have a twisted core, you can use a "low-pressure steam-jet generator" (a tea-kettle or similar with a small opening for the steam to escape; I use an Erlenmeyer flask with a small opening in the stopper) to straighten the core. Place the core in the steam and gently untwist it down its length, keeping your fingers on either side of the steam jet.
Surfacing cores and cross sections:
I use a combination of electric hand planers, belt sanders, and hand sanding to prepare cores or cross section samples. For cores, the easiest means to surface them is to use a series of sanding belts on a belt sander turned upside down. You can either go through a whole sequence - i.e., start with 220 grit, then move to 320 or even 400 grit sandpapers for a final finish - but lately I just do one pass on the sander with 320 grit, then do the final 400 grit surface by hand sanding once I have the sample under the microscope. (Be sure to get some sandpaper sheets in 320 and 400 grit for hand sanding of cores right at the microscope.) The single pass on the belt sander saves lots of time in the shop. Also I used to recommend 3x21 sanders (belts 3" wide by 21" circumference), but now recommend 4x24 sanders. They are heavier and somewhat harder to handle than the smaller sanders, but they cut the wood so much faster, again saving time in the shop. One problem is that the larger ones are harder to turn upside down; usually they don't have a flat top like the some of the smaller (especially Bosch) sanders. For these, easiest way to handle them upside down is to make a wooden gig to hold the sander solid on the table. Another invaluable item for sanding, especially when working with resinous pines and other conifers, are rubber belt cleaners. The sandpaper quickly fills with sawdust and resin and these are used to clean the belts; they are extremely valuable items to have in your shop.
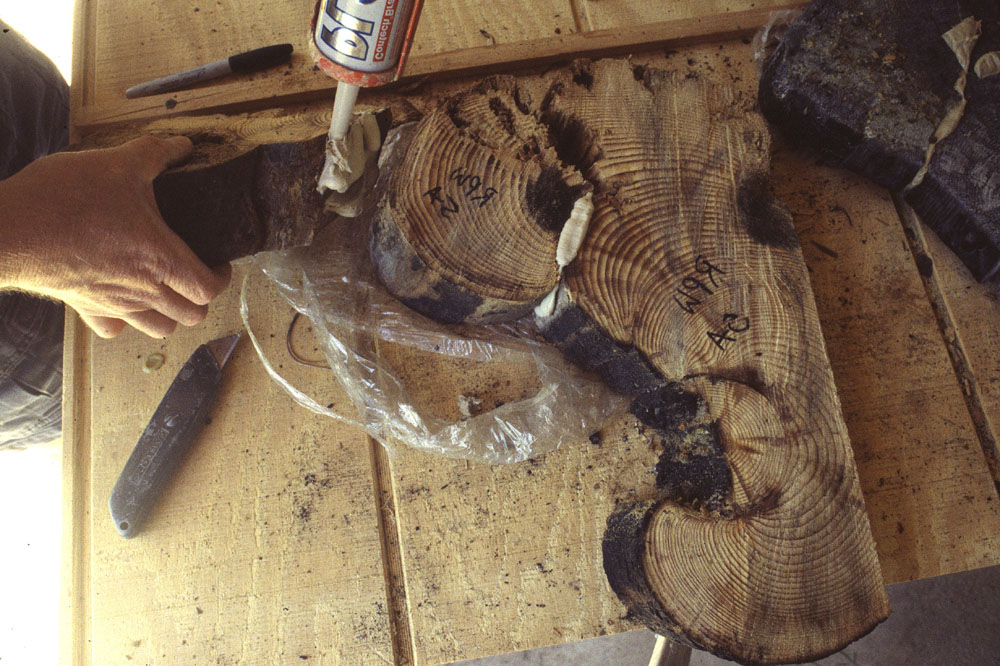
For cross sections, especially from the old stumps or other remnants, the first thing they often need is gluing and stabilization before they can be sanded. Wood or white glues can be used, but these tend to run all over the place and are hard to use on old chunks of wood. I recommend using construction adhesives, especially PL200, that come in tubes to be used in a caulking gun. These glues come out much more solid from the tube and fill up voids in the wood much better than liquid wood glues. One issue with construction adhesives is they do give off a lot of fumes (VOCs), so be sure to use these only in a well ventilated area. Also it takes more time for these to set up, so allow for 2-3 days for drying before sanding. On very fragile sections, glue them to a backing board for added strength and stabilizing. However, I do not recommend backing boards for fire-scarred sections if it can be avoided; occasionally I want to surface the other side of the section to see a fire scar more clearly.
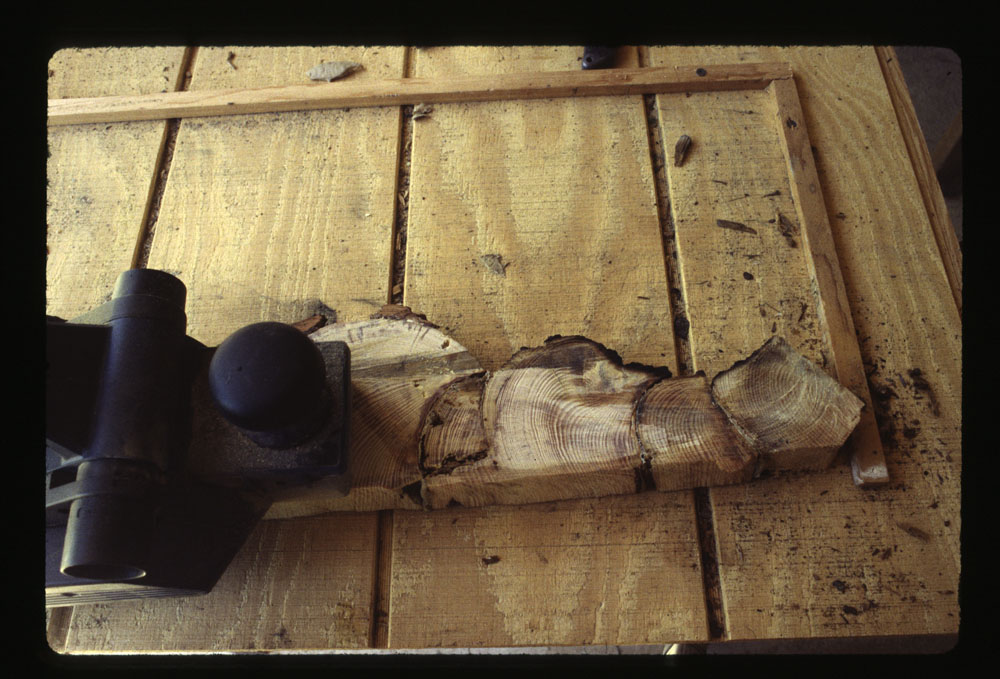
Once sections are glued and dried, I like to first use an electric hand planer to put a flat surface on the wood before surfacing with the belt sander. It takes some practice to use the planer well. Two tricks are to not take much wood off with any one pass and move the planer across the sample with each pass. You'll want to take down the high points on the sample first before trying to run the planer across the entire section. Also be careful not to take the planer all the way to far edge of the sample, it will flick off pieces of wood. After you have a flat surface with the planer, then go through the series of belts on the belt sander: 150, 200, 320, and 400 grits. However, I find that it works really well with just two grits after the sander: 150 and then 320. Once again, this saves a lot of time in the shop. If you don't want to buy one more piece of equipment, you can of course just use the belt sander and start with a very coarse-grit sandpaper (60 or 80) instead of the planer. However, I highly recommend the planer; with a little bit of practice it is a much faster way to remove chainsaw cuts on your cross sections.
Care of Increment Borers:
It pays to take good care of your increment borers since these are the basic tools for dendrochronology (and they are expensive!). Taking care of them means making sure they stay clean and sharp. Borers should be cleaned both after a day of use and, in many situations, often several times during the day when coring resinous wood. Anytime the cores are coming out broken or twisted, first try cleaning the borer, but it also may be a sign the borer is dull or has a knick in the tip.
To clean borers, most of us use WD-40 which both loosens the resin and other buildup inside and outside the shaft and reduces the possibility of rust. To clean the inside of the borer, the easiest method involves twisting a small amount of very fine (#000) steel wool on the threads near the tip of the spoon (extractor) and using that as a ram to clean the shaft. Spray the inside liberally with WD-40 to loosen any buildup before cleaning with the steel wool. Sometimes the steel wool will fall off the tip but can usually be worked out with the spoon through the tip of the borer. After cleaning the inside with the steel wool on the spoon, pull it off and then scrub it on the outside of the shaft. Be careful with the steel wool around the cutting tip; you do not want to ever put metal on the cutting tip, even the steel wool! Another option some use is a gun cleaning kit, but that is one more item to have to take with you when the spoon/steel wool combination works just fine.
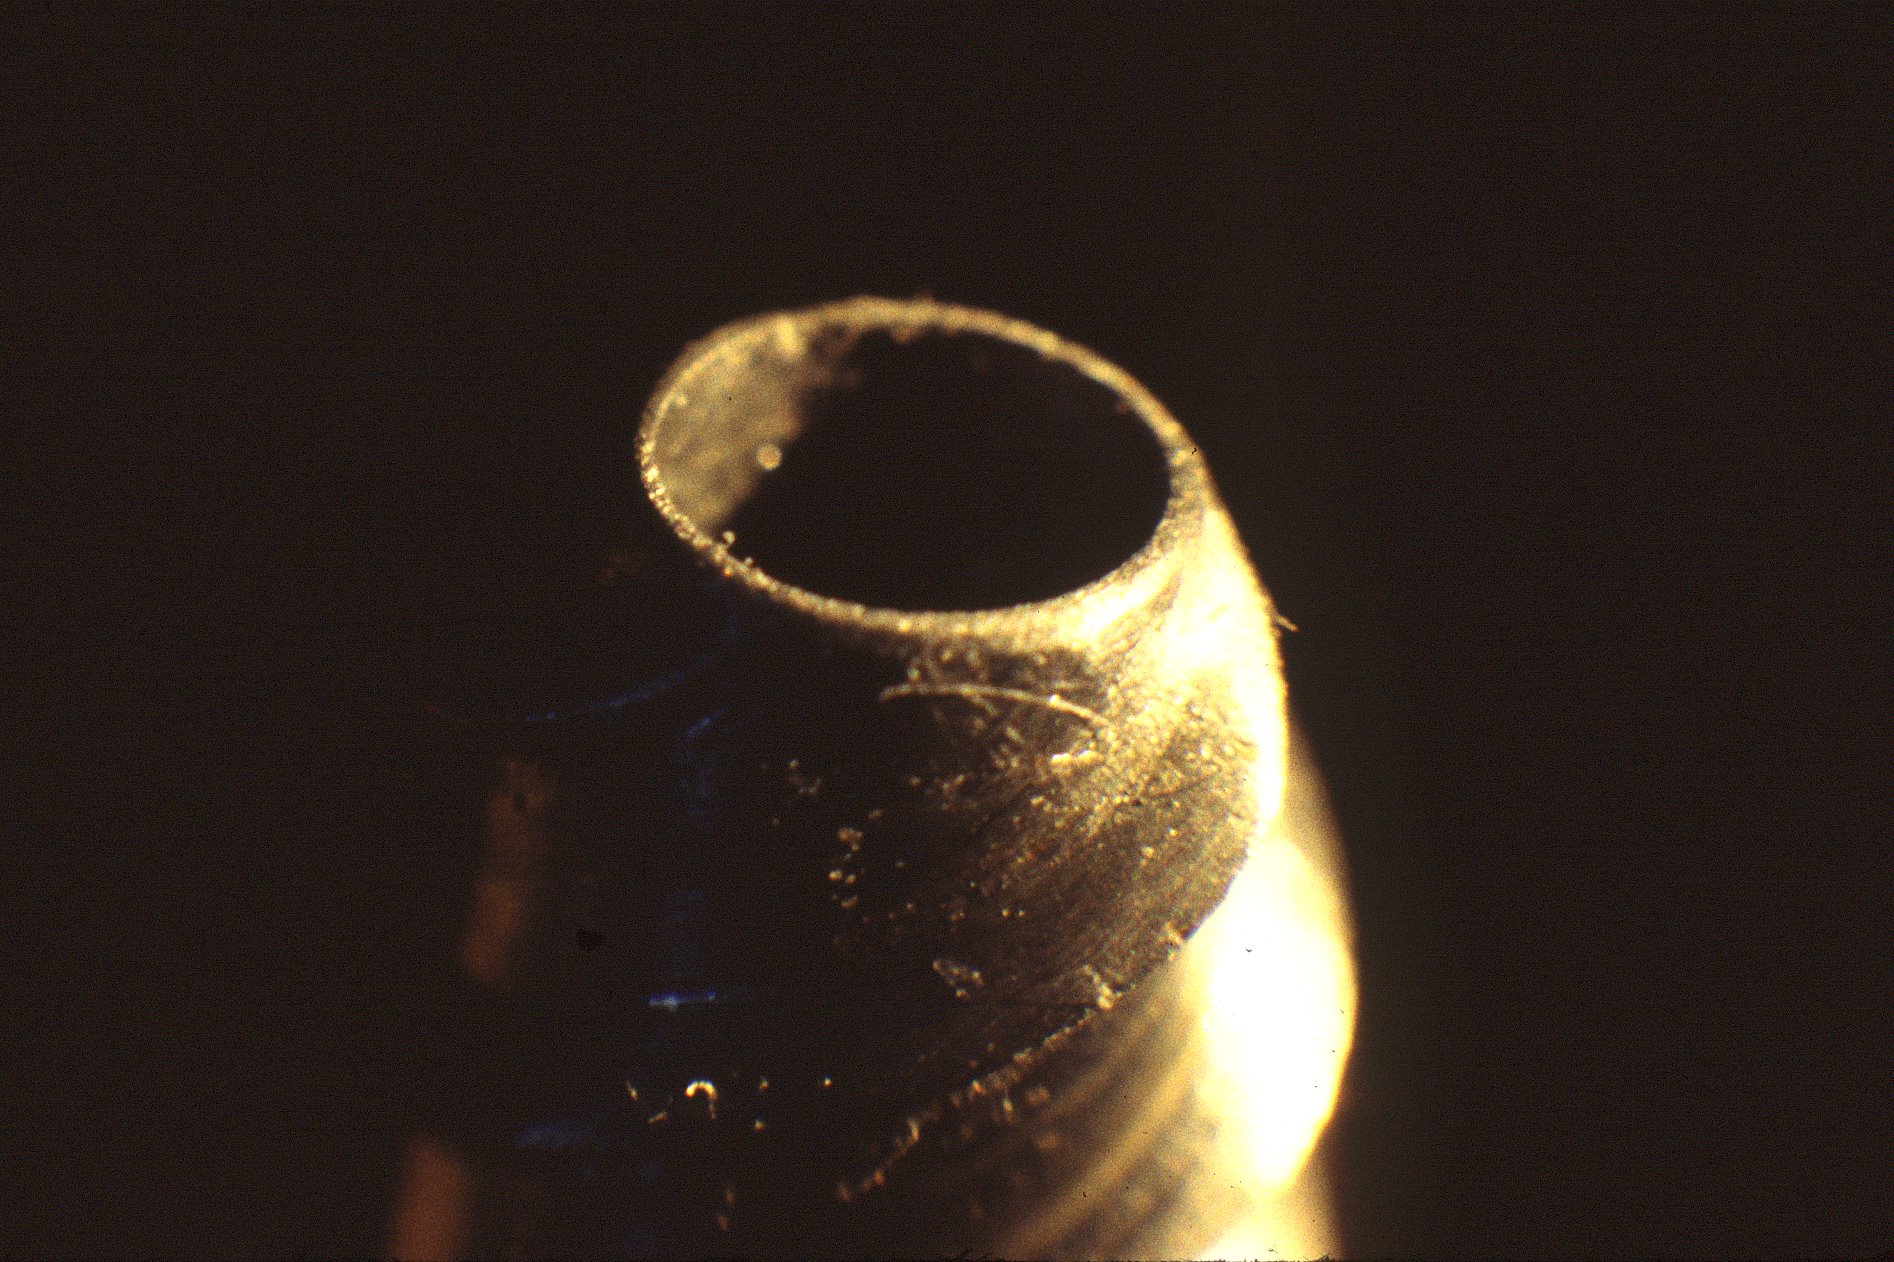
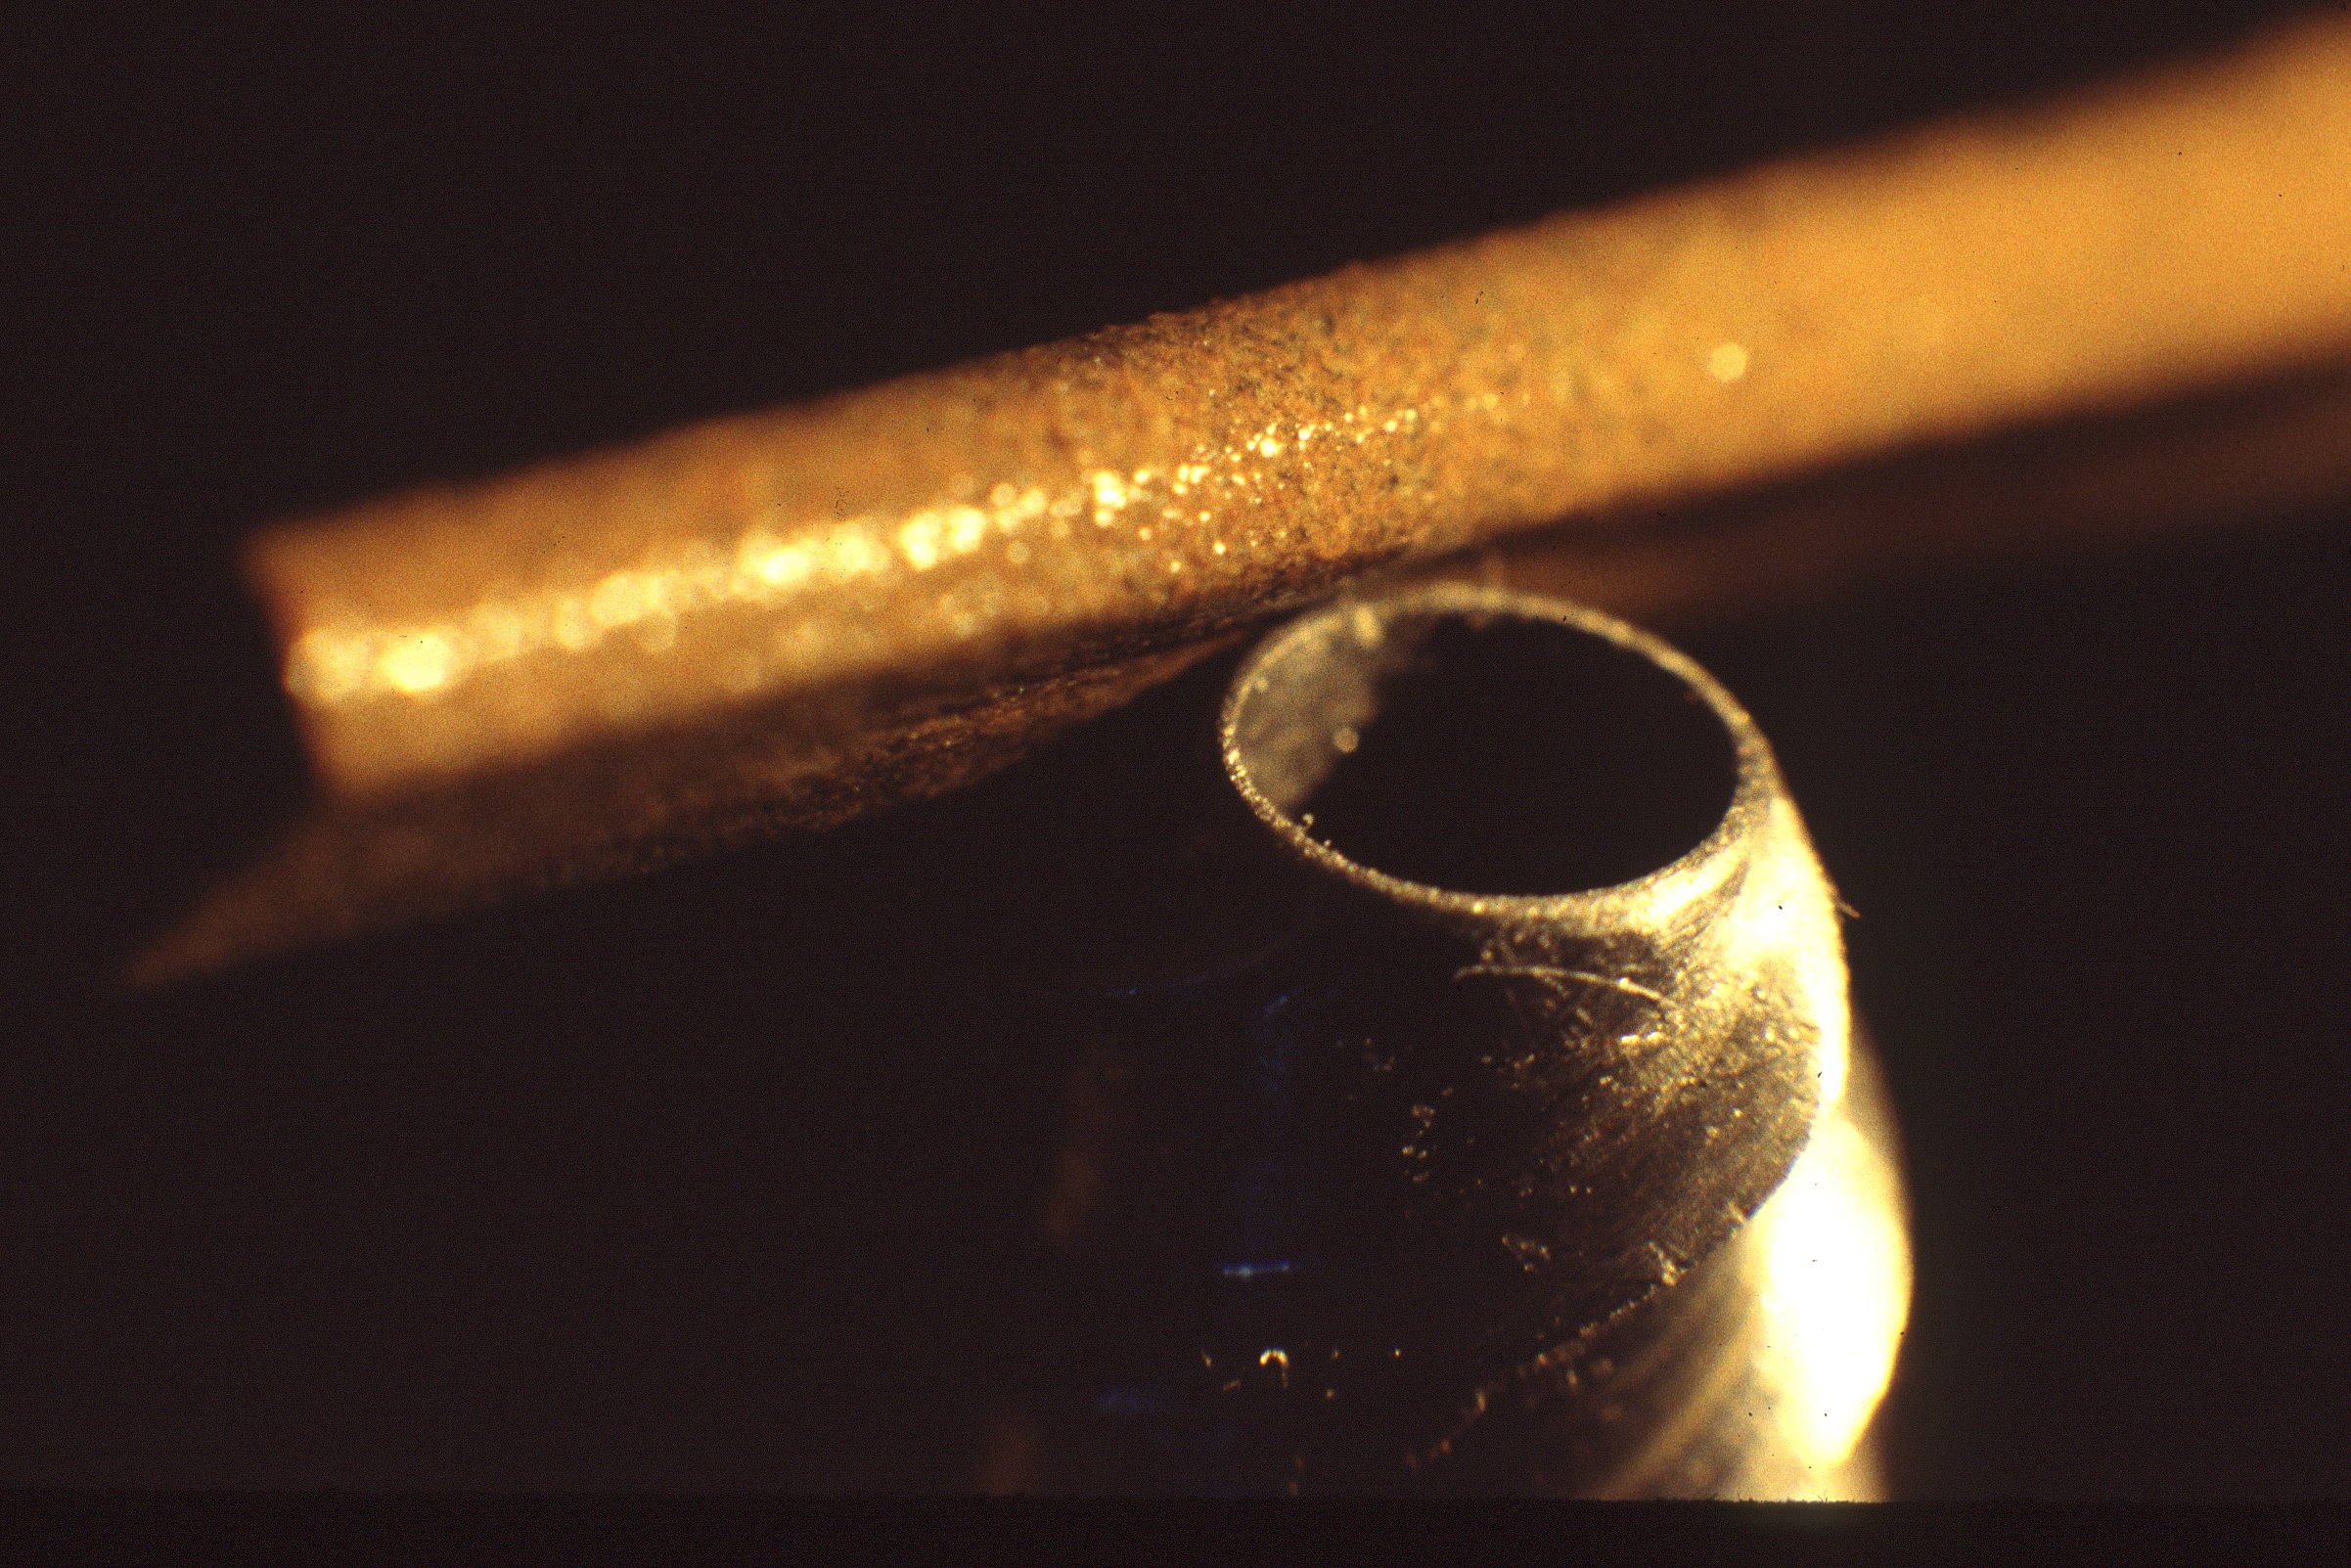
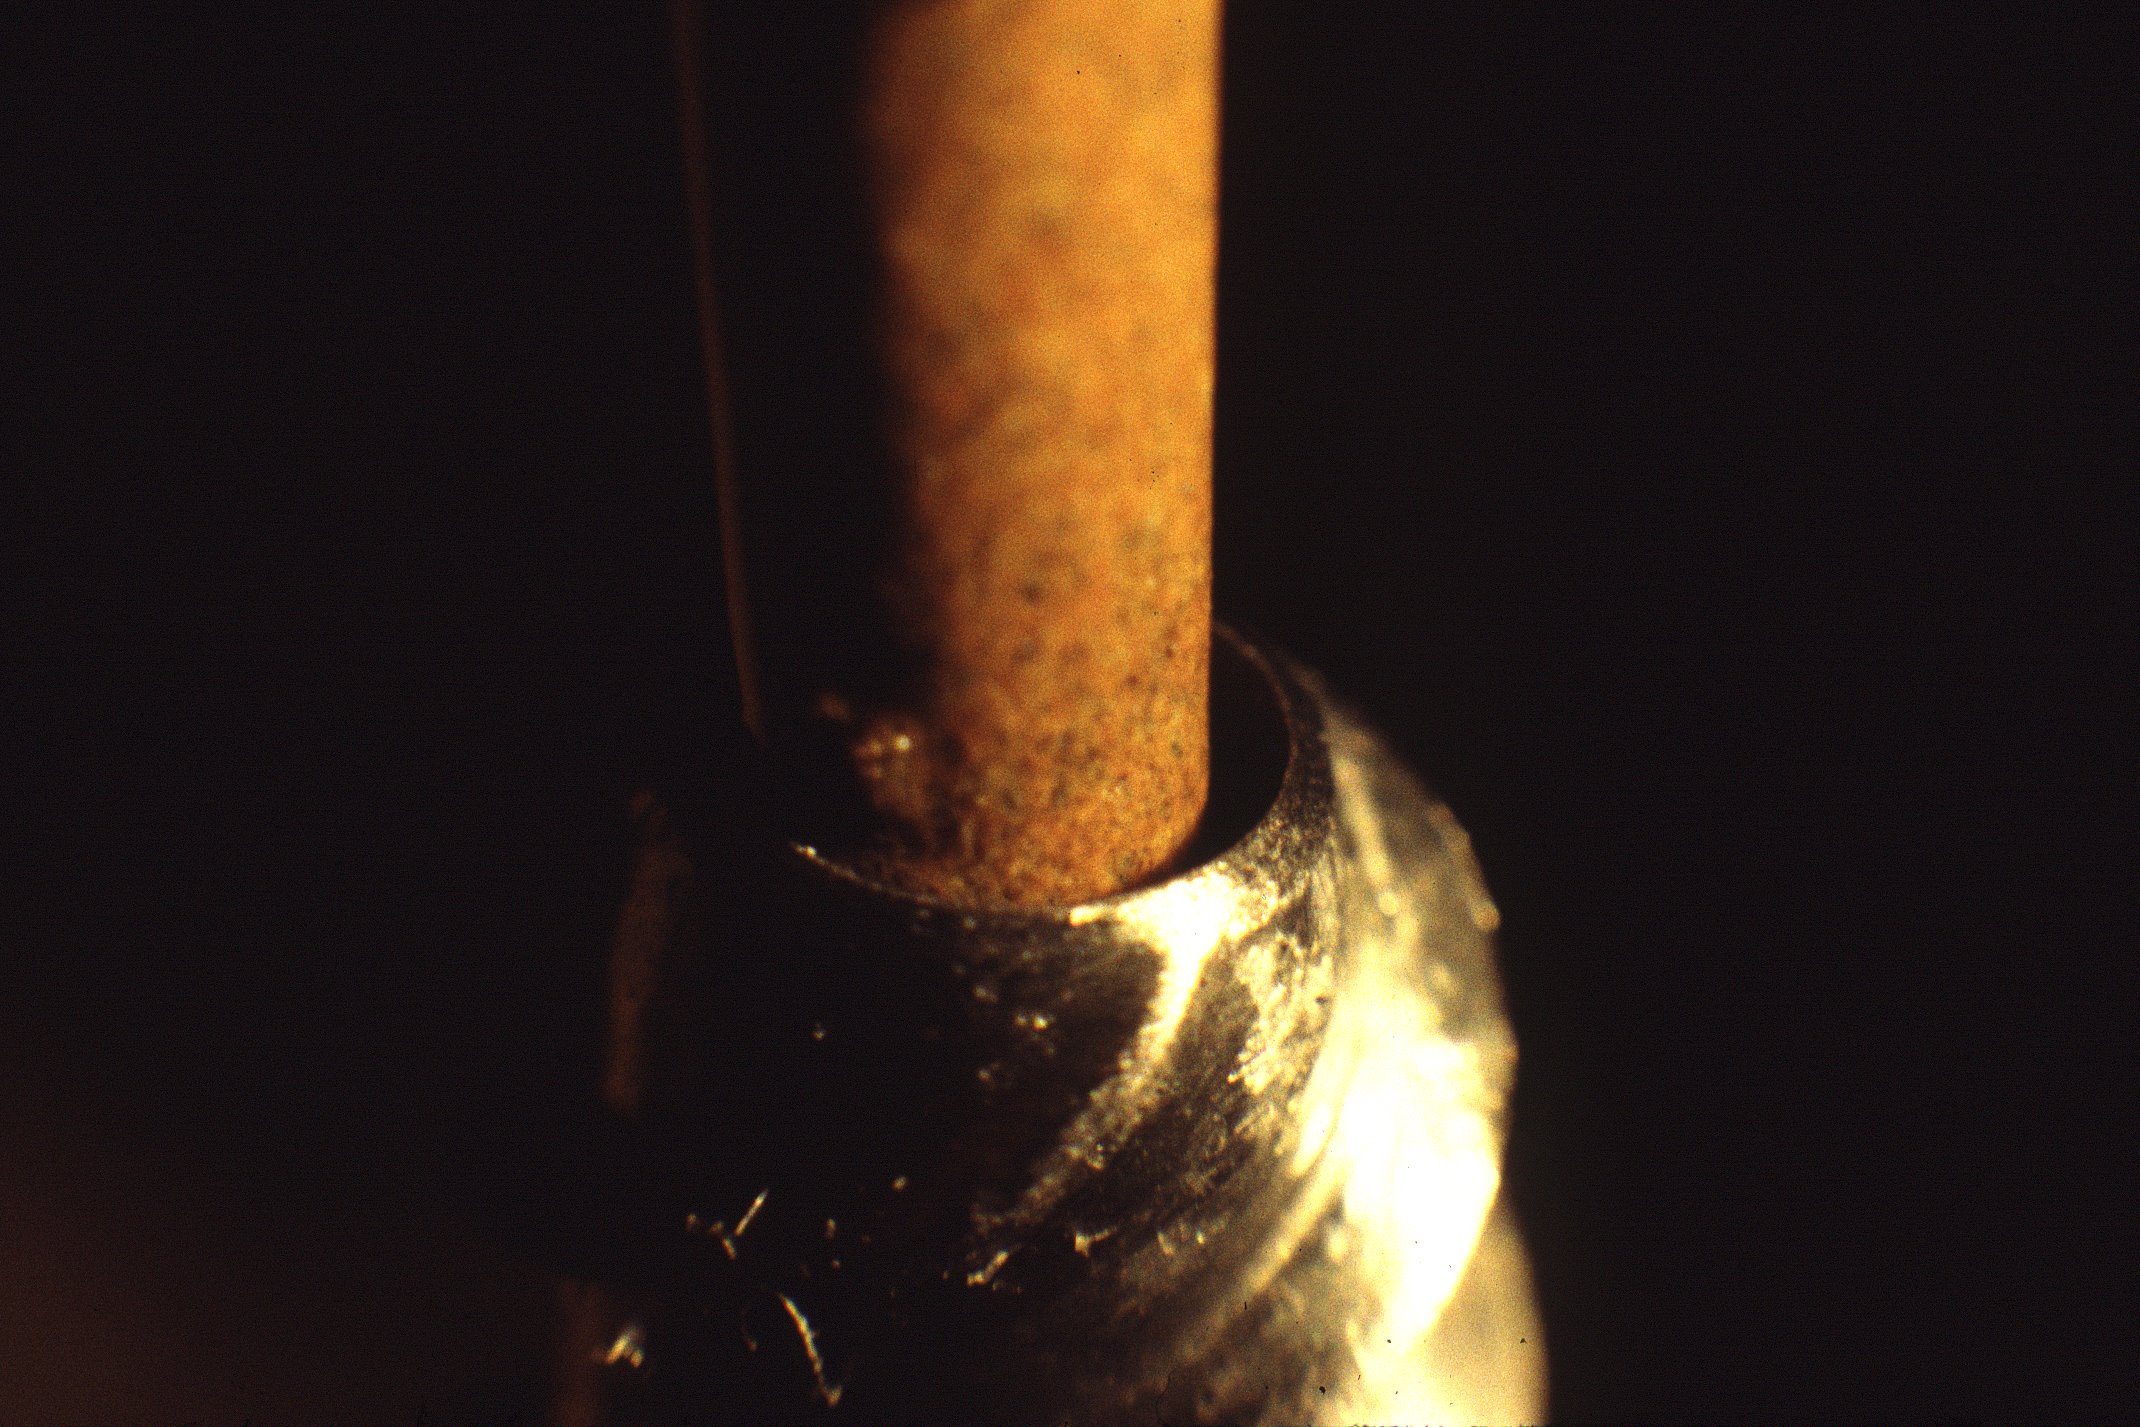
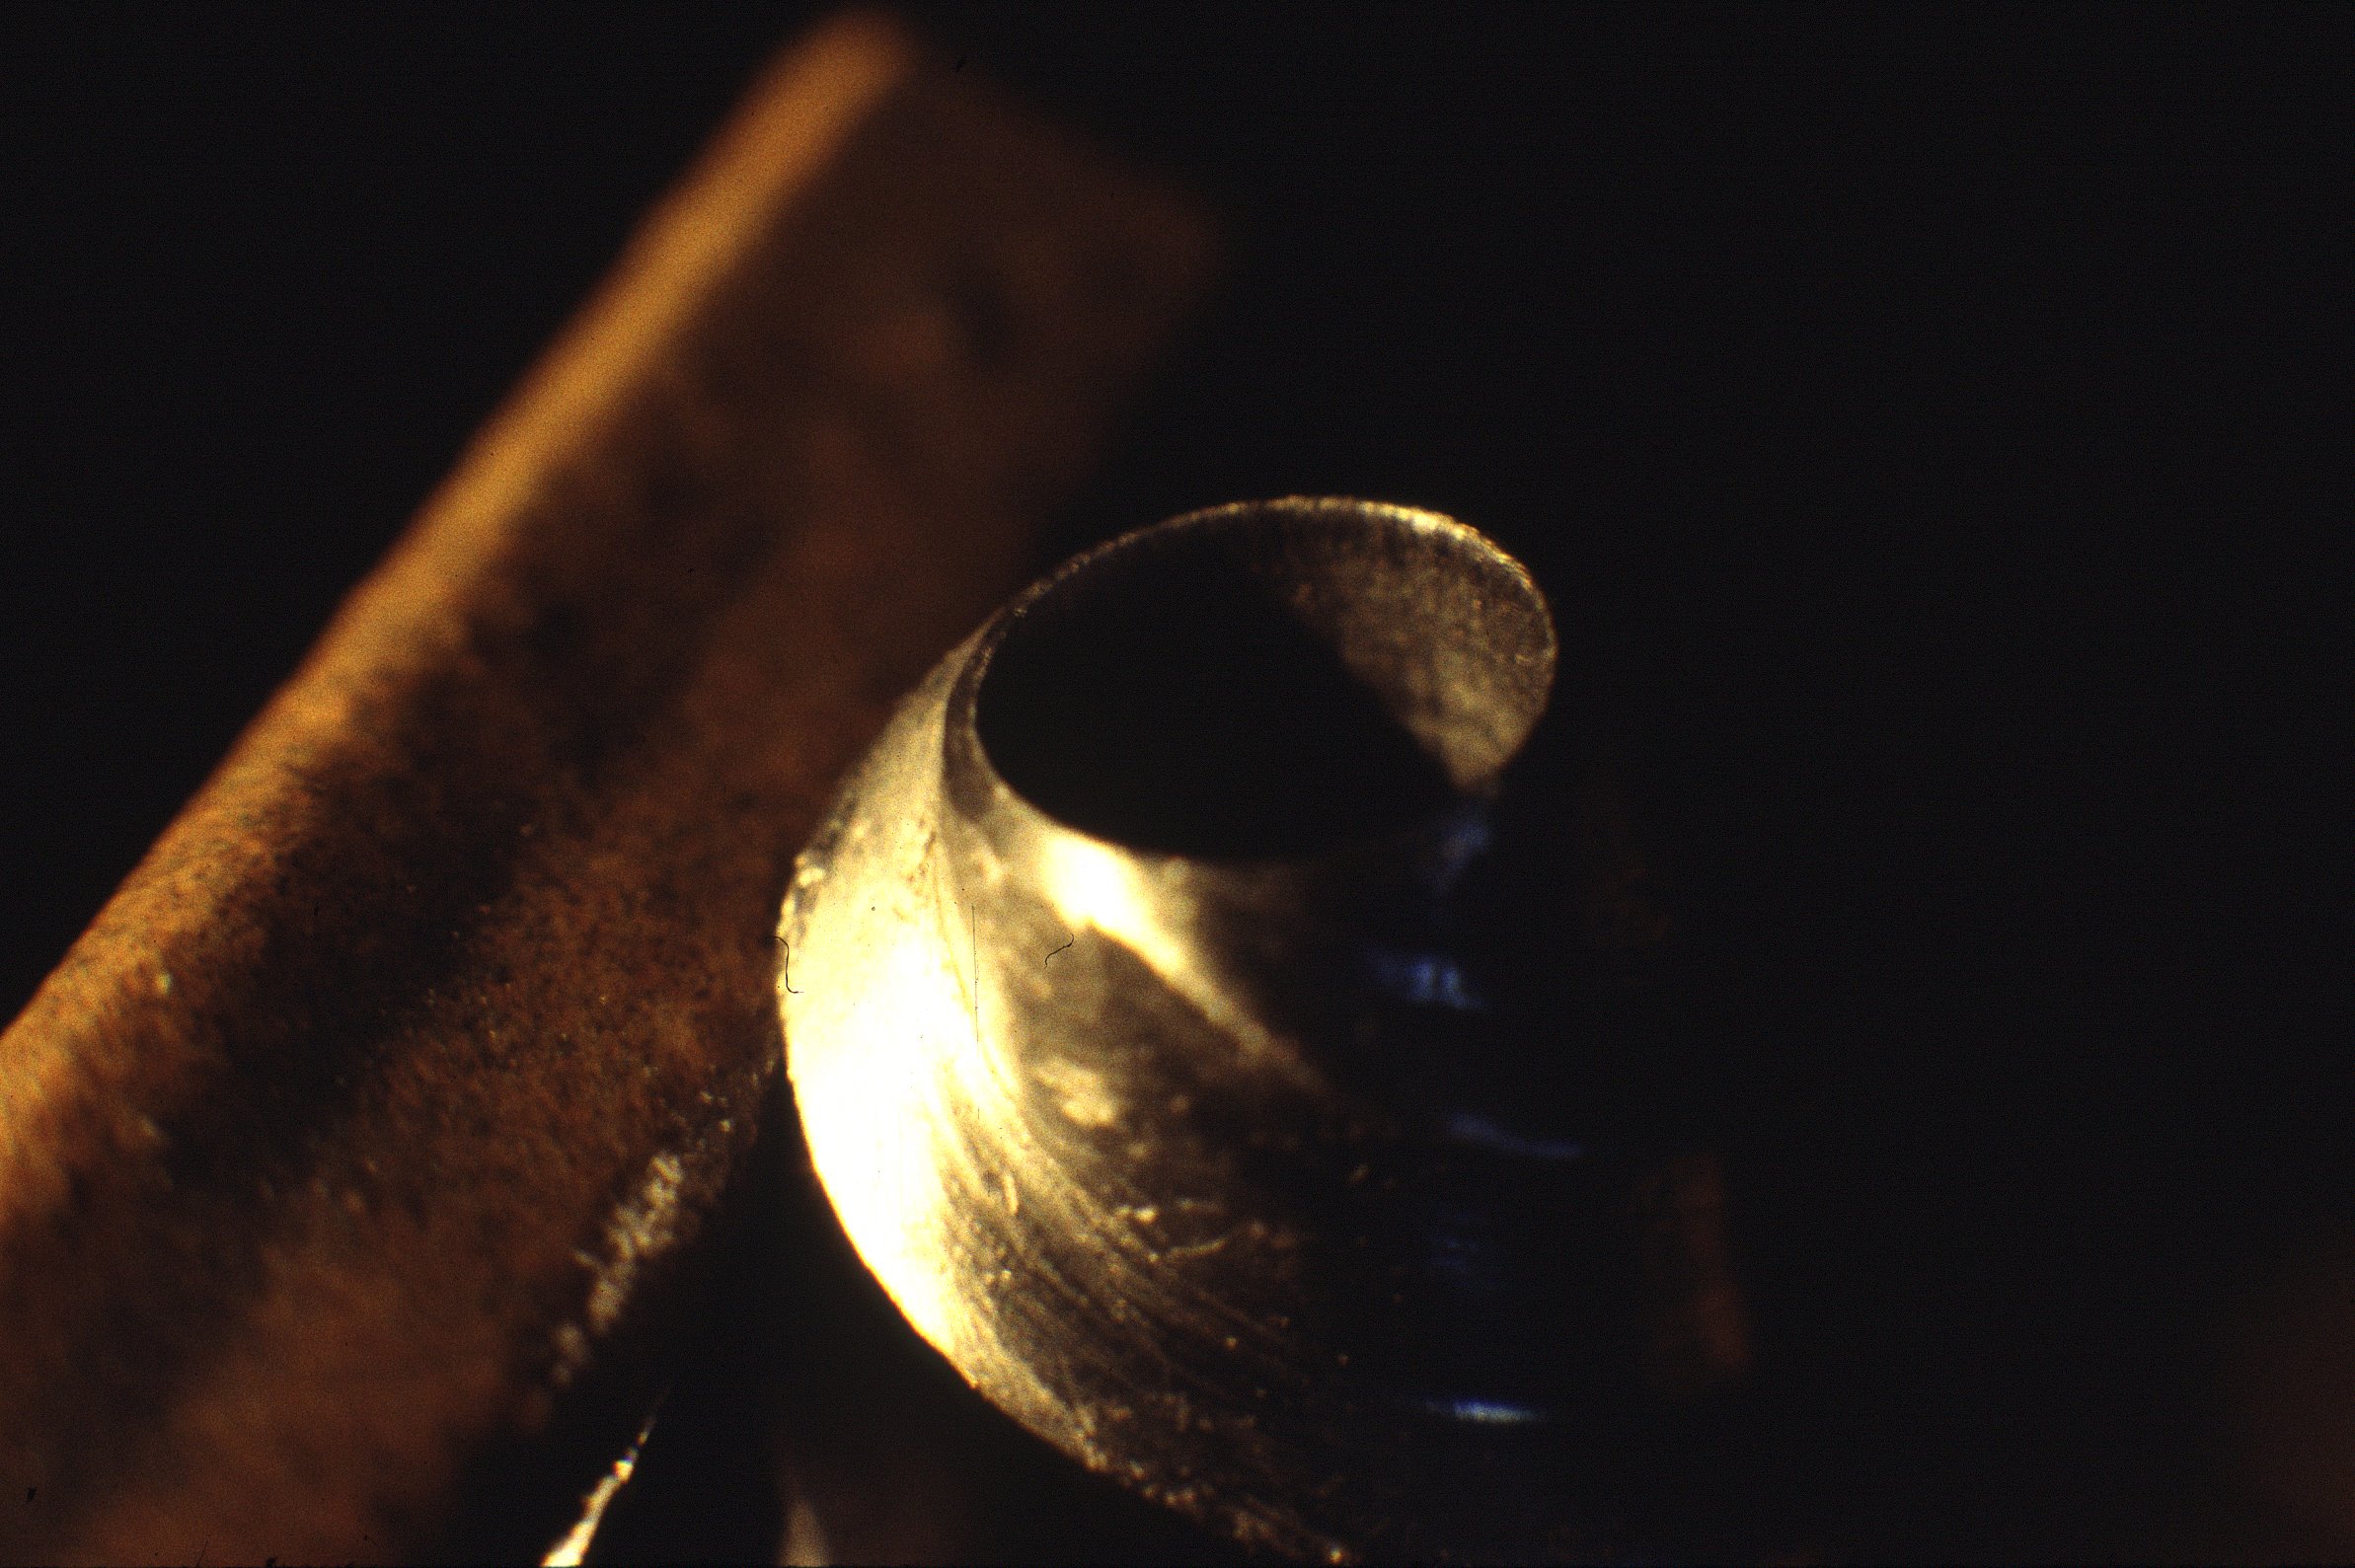
Sharpening your borers takes some skill and practice, but all dendrochronologists should know how to do this. All field kits should have a sharpening kit (available from forestry supply companies) that includes a rough stone for taking the steel down fast, a flat fine stone for finish work, a conical fine stone for the inside of the borer, and a bottle of lubricating oil for the stones (always use the lubricating oil to keep the stones from becoming clogged). Borers can be touched up at any time in the field, but if they have a nick in the tip I usually put those away until I can sharpen them underneath my microscope back in the lab (be sure to take several borers with you on a collecting trip, that way you will have backups if one gets a nick). If the nick is too large, more than about 1/4 cm or so, the borer is useless; to remove it will require that the constricted opening at the tip would have to be pulled back too far and any core would be too large for the spoon to be inserted.
I have a series of photos for sharpening a small nick, (visible in this photo as the glint in the upper right on the cutting tip. (Yes, even that small of a nick can cause the core to twist or break). The first step is to remove the nick by flattening the tip to the point it is no longer a break in the rim. This can be the hardest part of the sharpening process since the rest of the borer is still sharp except for this one small location. But it must be done! The best way to do this is by scrubbing the tip with the rough stone, constantly turning the borer such that the tip is flattened around the circumference evenly. The next step is then to put the edge back on the outside of the tip. This can be done starting with the rough stone and then with the fine flat stone. Do this under your microscope and you can see exactly when everything is back to a single sharp point around the rim. The angle should be about 40-50°, not too steep but still sharp enough to cut the wood. The borer should again be turned constantly to avoid removing too much steel from any one spot around the rim more than the rest (try to keep the tip a constant flat plane when viewed from the side; a depression along the rim will result in uneven cutting of the wood and catching of the wood fibers, which can also twist your core as much as a nick). The final step is then to take the "burr" off the inside of the shaft with the round stone. Do not use the round stone to take any of the steel off from the inside of the borer. The cutting tip is "uni-facial", with only the outside angled in and the inside straight. And just to be complete, I like to also sharpen the threads near the tip, this is very important when trying to core remnant trees but also just makes it easier to start the borer in any tree.
I hope these techiniques have been instructive, and have fun collecting and surfacing your tree-ring samples!